

Backend lovers, this is for you! Today I am starting with this development series where I will be talking about all things BUILD. This is the very first article in this series. We will be building a node.js project and learning how to develop a REST API. We will later test this API using Postman. I am using VS Code as IDE, but you can use your favourite text editor.
Let's begin...🏎

Let's create a folder called "node-demo" where we will create our node project.
Now run the command
npm init -yin the terminal. This will create a package.json file that will contain the entire information about the project like its version, dependencies, license, author, etc. Right now it will insert some default info for each prop since we passed the-yflag but if you want you can change them later as per your need.
Now let's set up a server using an
expressmodule. Runnpm install expressto install express. You will be able to see it in the dependencies object inside the package.json file after the installation is complete. There will be 2 more additions in the folder callednode_modulesandpackage-lock.jsonfile.Now create a file called
index.jsin the root folder. Here we will import our express package and start setting up the server. We are following the "commonJS" format hence we will use require instead of import. If you want to use import instead, you must specify the"type": "module"in your package.json file. Alternatively, you can rename the file index.js toindex.mjs.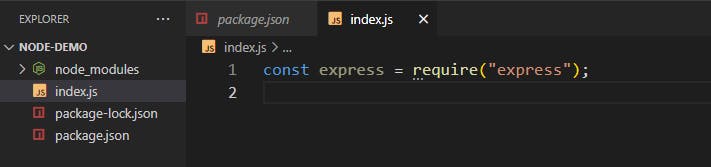
Let's call the express function to create a server object. We can call this
app. Now using this object, we will set up our REST API. This server will be listening to the requests made by the user on some port on ourlocalhost.The first is a very simple
GETrequest mechanism. This will simply send a response to the user when the request is made to the URL path -/. We are also making this server listen to the port3000. Now we can run the express server by writing the commandnode index.jsin the terminal. If everything works, it will print a simple message in the terminal "server is listening..".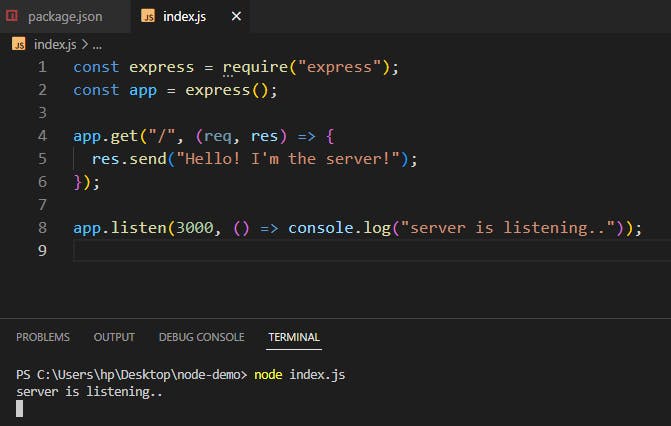
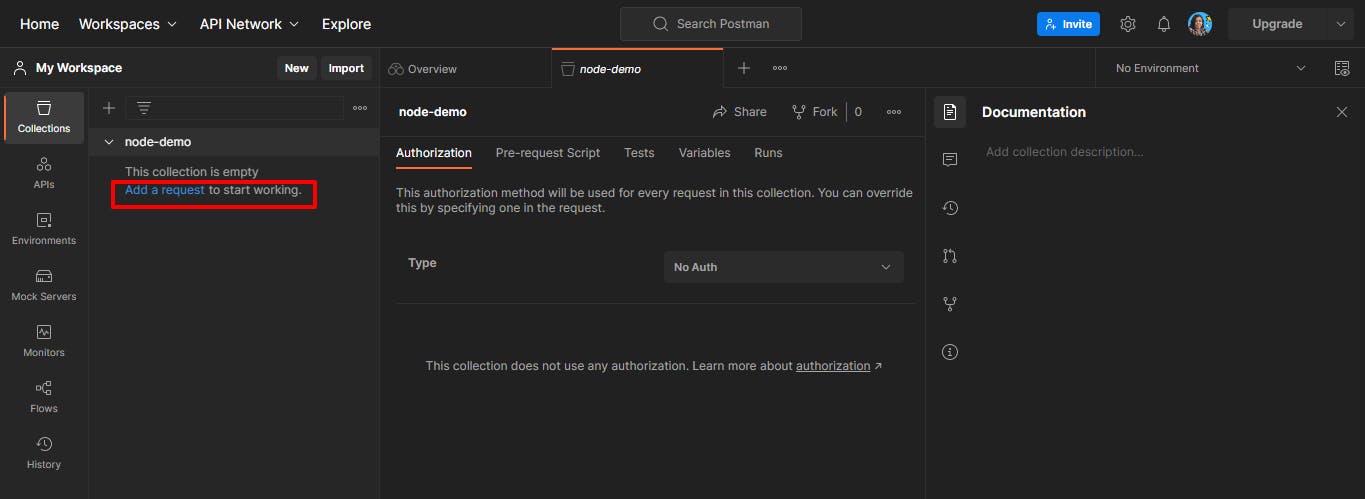
We can use Postman to test the server. Postman is an API testing platform. You can go and create a new workspace or just use the default "My Workspace" to make API calls. We will create a collection called "node-demo" and then add a request.
Since we are going to make requests to a server that is running on localhost, make sure that you use the Postman's Desktop Agent else you won't be able to make any requests. Now make a GET request to this URL:
http://localhost:3000and click Send. You will see the response "Hello! I'm the server" below. This means that our server is working!!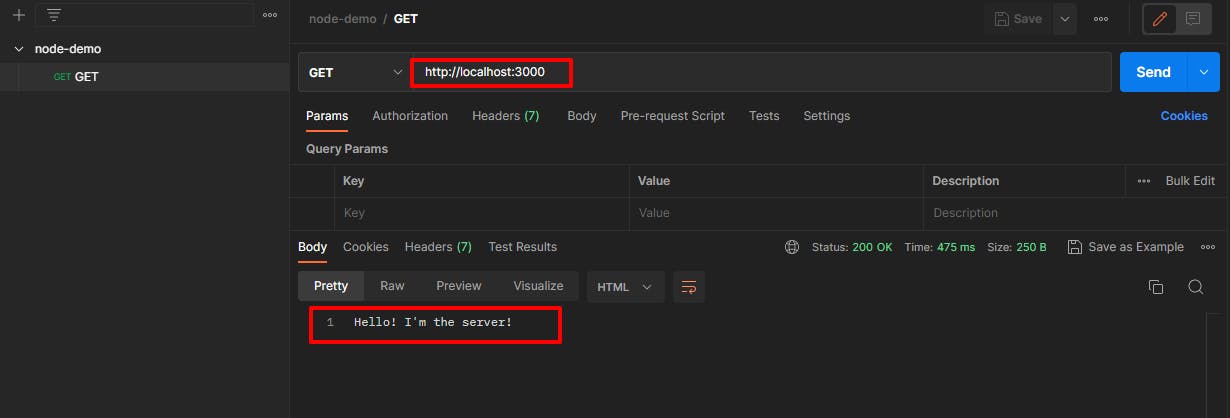
Yay! We just made our first API request and it was successful. Let's move ahead. Now we can look into another type of request called POST.
We will now make a POST request where we will send some data. GET can be also used but it's less secure since it doesn't provide data encryption as POST does. Now before we make changes to the index.js file I want you to install another quite handy dependency. It's called
nodemonand it automatically refreshes the server whenever there will be any change in the code. We will install it as a dev dependency since it's not meant for production. So run the commandnpm install nodemon --save-devin the terminal. After this, we can create a script in the package.json file as"dev":"nodemon index.js".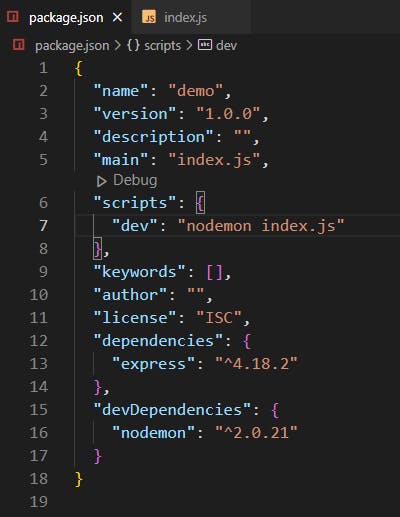
Below is the POST mechanism. Now make sure to use a middleware provided by express called "json" which is responsible for handling incoming requests with JSON payloads and is based on body-parser. Add this line to your index.js file:
app.use(express.json()). Without it, your POST request would fail if you are trying to send some JSON as the body. Now, let's start the server again by running the script dev -npm run devthis time.
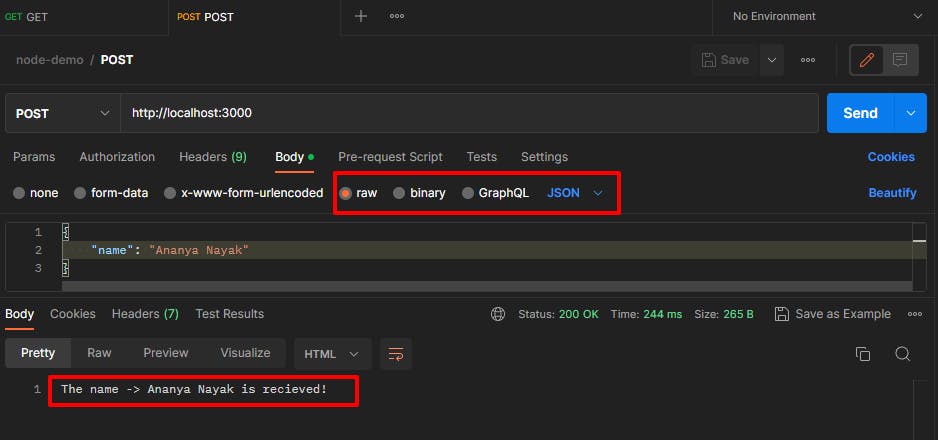
Let's make a POST request with Postman. This time we will have to send a body as well. We will send it as raw -> JSON type. After clicking Send you can see the response below.
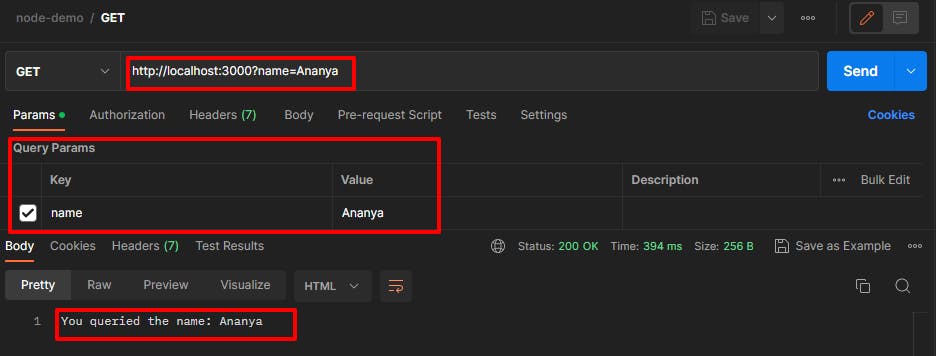
Great! You have now learned 2 major request types: GET and POST. There are many other types as well like PUT, PATCH, DELETE, etc. but for now, we will focus only on these 2. What about sending a GET request with some query parameters? For this, we will modify the same GET callback we defined earlier and tell it to look for the query object to send a response accordingly.
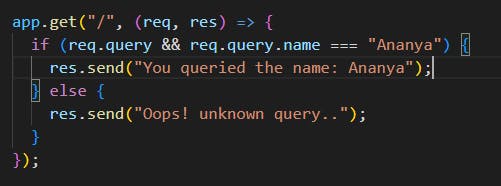
No make a GET request to the same URL in Postman but remember to pass query params. Set the key as "name" and the value as "Ananya". On clicking Send you should get the first response as defined in the callback.
Cool! Let's look into Path params now. What if you want to send some dynamic value to the URL maybe some kind of "id"? To access it on the server side we will have to do something like this:
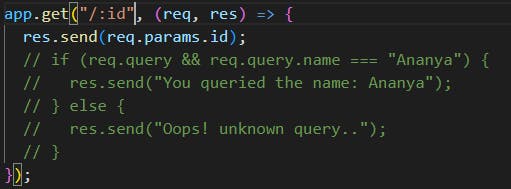
Below is the Postman request with the Path variable "id".

Awesome! You just built your very first server with the help of node.js and express. You also learned about Postman and how to test APIs with it. Hope this article helped you get a basic understanding of Node.js.