


Let's build a CLI app with Supabase⚡
Unleash the Power of Supabase: Building a CLI App with Node.js


What are we building? 👩💻
Hey peeps! I am excited to write this article since I love building CLI tools and I think you should too :) It's really fun and most importantly, so easy to make! Let's talk about what we are going to learn by making this project.
Get familiar with an open-source Firebase alternative called Supabase
Using the NPM package commander to make the Nodejs CLI
Some good Git practices
Our app would look something like this at the end 👇
It's a simple TODO and note-taking CLI application. You will have various commands using which you can perform CRUD operations. You can authenticate yourself and then access your notes or todos with the Supabase API.
The CLI app will have the following commands:
register: registers a new user
login: login as a user
logout: logout a user
todo-add: add a new todo
todo-list: list all todos of the logged-in user
todo-update: update a todo
todo-delete: delete a todo
note-add: add a new note
note-list: list all notes of the logged-in user
note-view: view a note
note-delete: delete a note
You can find the whole source code here for reference 👉 todo-cli GitHub repo

So... let's begin! 🦄😄
Setting up Supabase ⚡
We can simply create a project in Supabase which will spin up a new Postgres db for us. Yes, Supabase is built on top of Postgres and hence all our data would be stored inside a relational table.
After creating a project you can fetch your API key and URL from Project settings > API. Now we are going to create our "todos" table which will have columns like title, priority, status, etc... In Postgres, tables should have RLS (Row level security) enabled so that no random user can access your DB. You can create policies for the table to decide which user can do what. In the below picture, you can see that I am allowing "anon" users (i.e. users with the anon key) to perform all kinds of operations on the table.

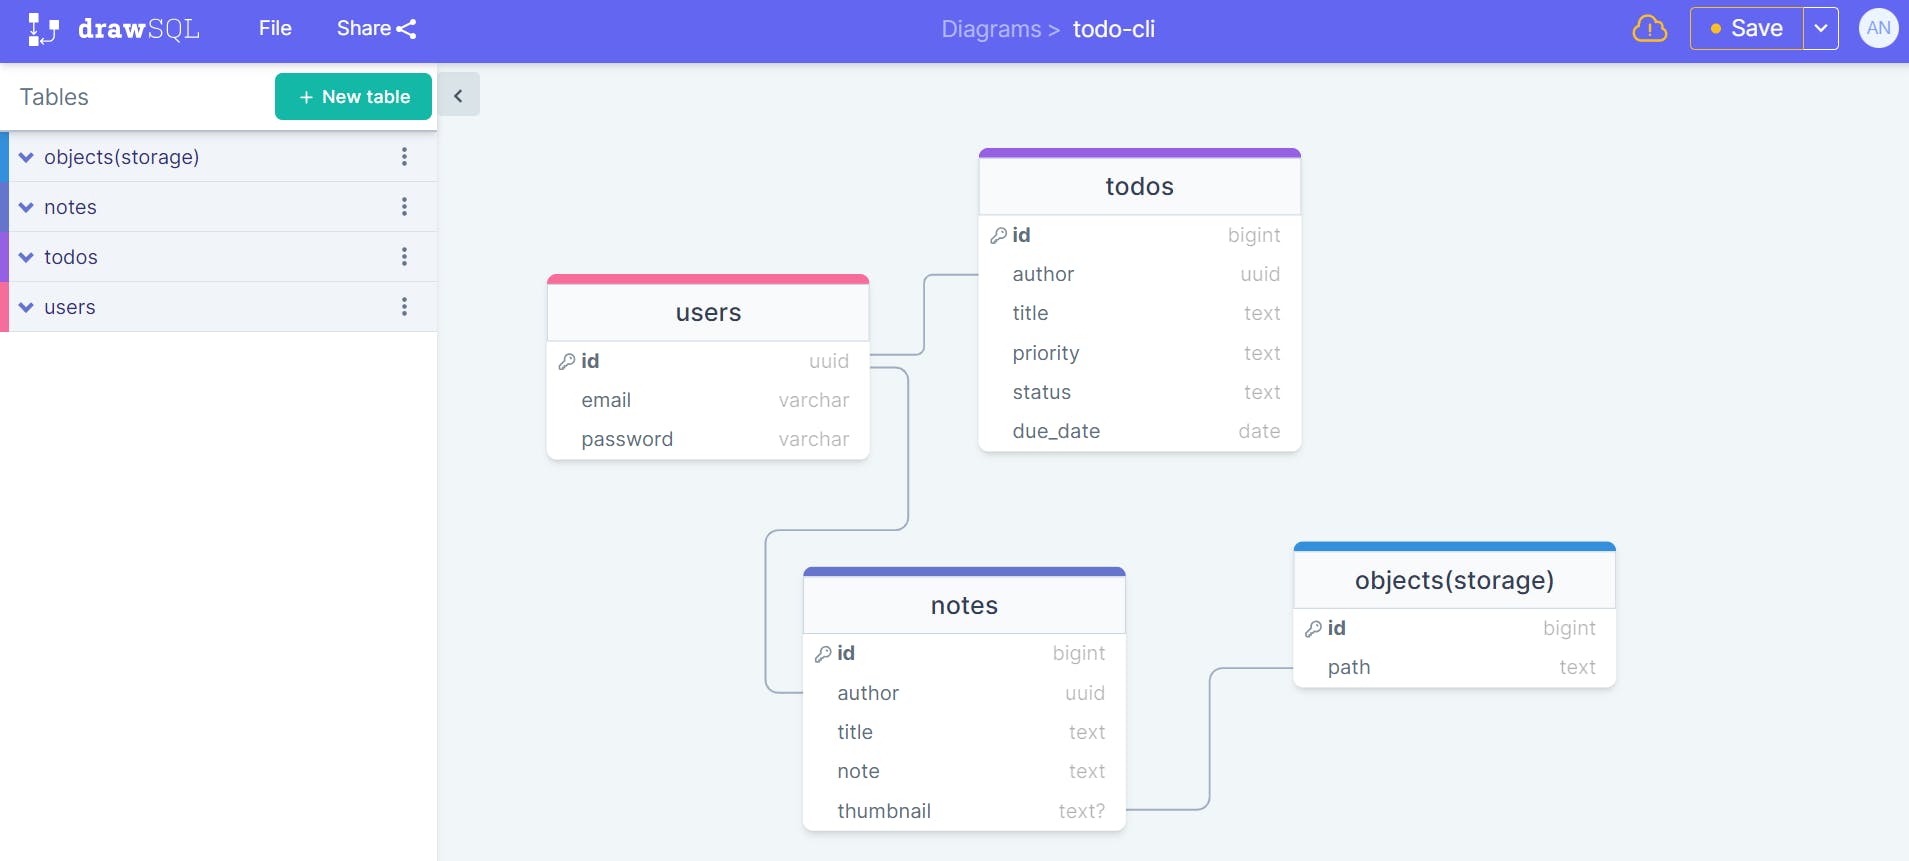
The DB design would look something like this: (made with DrawSQL)
Now let's move on to our CLI app.
It all starts with "npm init" 💚
You should have Nodejs installed on your machine. Later on, you can create a node project by running the command npm init which will ask for some info about the project like package name, version, license... you can change these later as well.
Now we will install some dependencies like:
commander for writing the CLI program
inquirer for creating prompts
@supabase/supabase-js which is the javascript client SDK for Supabase.
some other dependencies like chalk, dotenv, etc...
In our index.js file, we will set up the commander program by importing the package "commander". We are following the ES6 format here.
import { Command } from "commander";
import figlet from "figlet";
import chalk from "chalk";

import { register, login, logout } from "./commands/auth.js";
import { todo_add, todo_list, todo_update, todo_delete } from "./commands/todos.js";
import { note_add, note_list, note_view, note_delete } from "./commands/notes.js";

const program = new Command();

program
    .name("todo-cli")
    .version("1.0.0")
    .description(chalk.cyanBright.bold(figlet.textSync("todo-cli") + "\n A simple TODO and note-taking cli app"))

// "auth" commands
program.addCommand(register);
program.addCommand(login);
program.addCommand(logout);

// "todo" commands
program.addCommand(todo_add);
program.addCommand(todo_list);
program.addCommand(todo_update);
program.addCommand(todo_delete);

// "note" commands
program.addCommand(note_add);
program.addCommand(note_list);
program.addCommand(note_view);
program.addCommand(note_delete);

program.parse()
The file structuring improves readability and maintainability. All of our commands are inside a commands folder and utility things like setting up the Supabase client, etc are inside a utils folder. On running the help command we can see all the other available commands.

Let's now understand how we are going to connect our Supabase project using the client SDK.
Connect to Supabase using client SDK 🔌
Inside the utils folder, we have a "supabaseClient.js" file which instantiates our supabase client. Make sure you have the .env file with the keys.
import { createClient } from "@supabase/supabase-js";
import dotenv from "dotenv";

dotenv.config();

export const supabase = createClient(process.env.SUPABASE_URL, process.env.SUPABASE_KEY, {
    auth:{
        persistSession: false,
    }
})
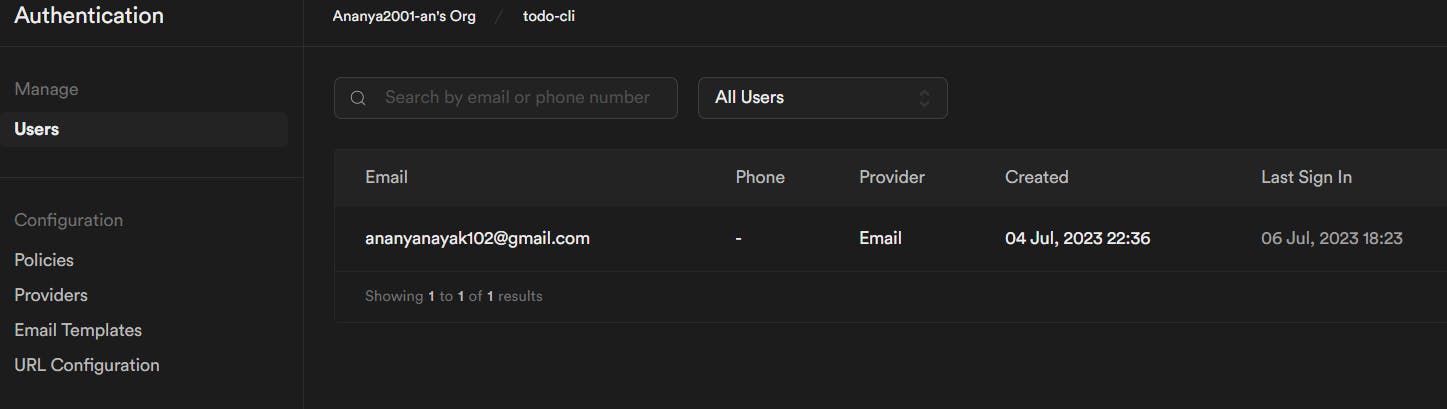
Now we can use this client to make requests to our Postgres instance. In the below code, you can see that we are allowing users to use the command node src/index.js register to create a user. This is going to update the table "users" under the "auth" schema inside your project.
export const register = program.command("register")
    .description("Register a new account")
    .action(() => {
        inquirer.prompt([
            {
                type: "email",
                name: "email",
                message: "Enter an email: ",
            },
            {
                type: "password",
                name: "password",
                message: "Enter a password: ",
            },
            {
                type: "input",
                name: "name",
                message: "Enter a name: ",
            }
        ]).then(async(answers) => {
            const {error} = await supabase.auth.signUp({
                email: answers.email,
                password: answers.password,
                options:{
                    data: {
                        name: answers.name,
                    }
                }})
            if (error) {
                console.log(chalk.redBright('⛔ ' + error.message));
            }
            else {
                console.log(chalk.yellowBright("👉 Verify your email to complete registration!"))
            }
        });
    });
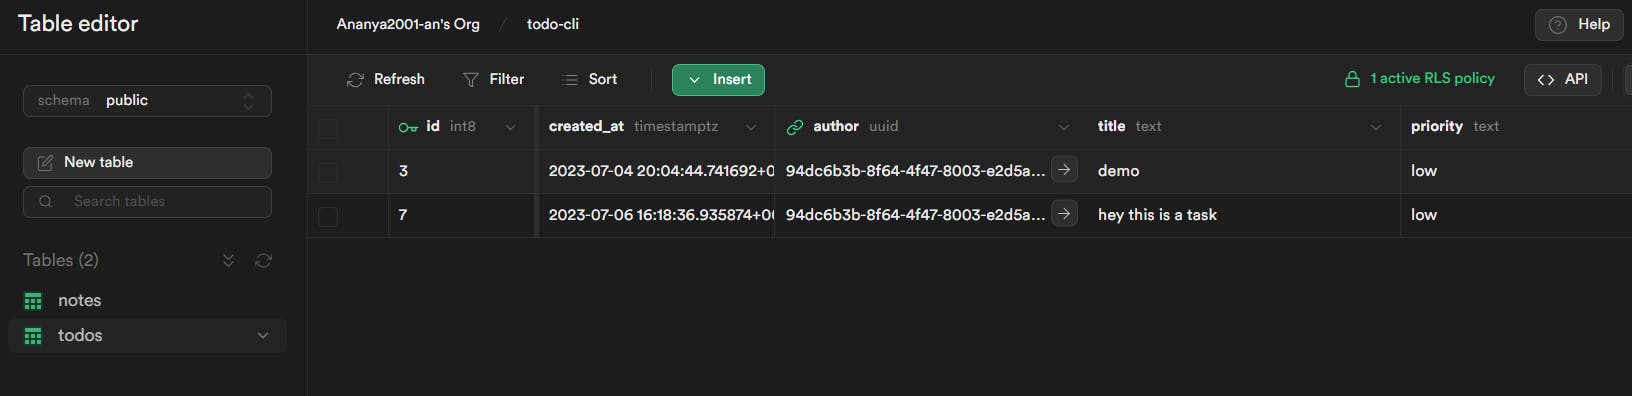
We can now create a new todo using the todo-add command like this:
Make sure that the right policies are enabled or else you won't be able to access the table.
export const todo_add = program.command("todo-add")
        ......
        inquirer.prompt([
            {
                type: "input",
                name: "title",
                message: "Enter a title: ",
            },
            {
                type: "list",
                name: "priority",
                message: "Select a priority: ",
                choices: ["low", "medium", "high"],
            },
            {
                type: "input",
                name: "due_date",
                message: "Enter a due date (yyyy-mm-dd): ",
            }
        ]).then(async(answers) => {
            const {error} = await supabase.from("todos").insert([
                {
                    author: session.id,
                    title: answers.title,
                    priority: answers.priority,
                    due_date: answers.due_date,
                    status: "todo",
                }
            ])
            if (error) {
                console.log(chalk.redBright('⛔ ' + error.message));
                exit(1)
            }
            else {
                console.log(chalk.greenBright("✅ Todo added successfully!"))
            }
        });
    });
You can see that the author column is a foreign key referencing the primary key "id" of the table "auth.users". This helps us in maintaining the integrity of the data. If a user gets removed all their corresponding data would also get removed. You can choose an action like cascade, default, etc...
Using Supabase storage 🫙
Now let's use Supabase storage for the note-add command which allows users to add images as well. This is the code for the command:
export const note_add = program.command("note-add")
        .....
        inquirer.prompt([
            {
                type: "input",
                name: "title",
                message: "Enter a title for your note: ",
            },
            {
                type: "input",
                name: "note",
                message: "Write your note: ",
            },
            {
                type: "confirm",
                name: "thumbnail",
                message: "Do you want to add a thumbnail? ",
            }
        ]).then(async(answers) => {
            let image
            if (answers.thumbnail) {
                const res = await inquirer.prompt([
                    {
                        type: "input",
                        name: "thumbnail_path",
                        message: "Select the path for your thumbnail: ",
                    }
                ])
                const { data, error: err } = await supabase
                    .storage
                    .from('thumbnails')
                    .upload(`public/${res.thumbnail_path.split('\\').pop()}`, readFileSync(res.thumbnail_path), {
                        cacheControl: '3600',
                        upsert: false,
                        contentType: `image/${res.thumbnail_path.split('\\').pop().split('.').pop()}`,
                    })
                if (err) {
                    console.log(chalk.redBright('⛔ ' + err.message));
                    exit(1)
                }
                image = data.path
            }

            const {error} = await supabase.from("notes").insert([
                {
                    author: session.id,
                    title: answers.title,
                    note: answers.note,
                    thumbnail: image? image : null,
                }
            ])
            if (error) {
                console.log(chalk.redBright('⛔ ' + error.message));
                exit(1)
            }
            else {
                console.log(chalk.greenBright("✅ Note added successfully!"))
            }
        });
    });
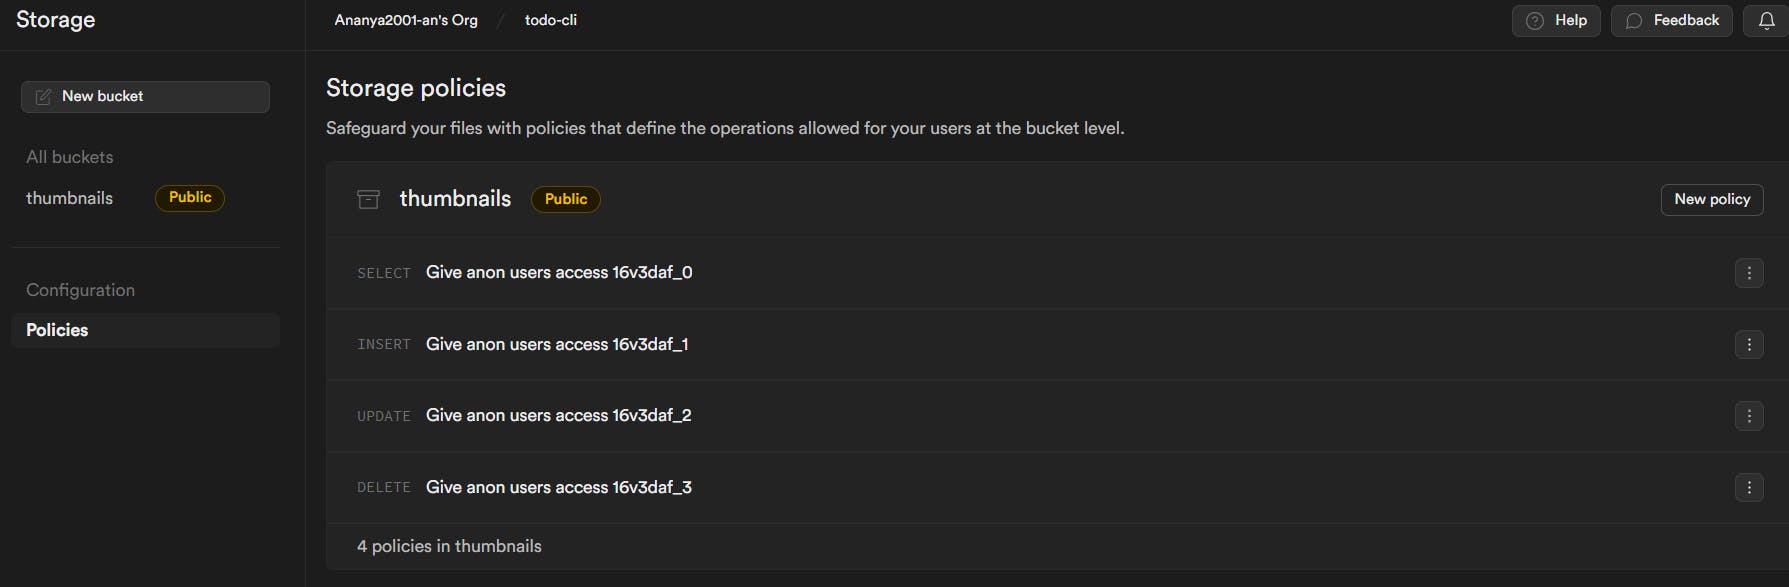
We have already created the storage bucket "thumbnails" with the necessary access policies. Using the "upload" command we can upload the image file to the respective bucket. After the image is uploaded successfully, we are storing its path inside the notes table so that we can, later on, refer to it to get the corresponding image.
Note that the "thumbnail" column inside the notes table is not a foreign key since we are storing the path here which is not a unique column (PK) inside the "storage.objects" table.

We are fetching the note using the note-view command where we are also displaying the image in the terminal (the quality of the image is very low since most terminals don't support good image quality so it might differ in your case depending on what you are using...)
export const note_view = program.command("note-view")
        ......
        const {data, error} = await supabase.from("notes").select("*").eq("author", session.id)
        if (error) {
            console.log(chalk.redBright('⛔ ' + error.message));
            exit(1)
        }
        else {
            const notes = []
            data.forEach(note => {
                notes.push({name: note.title, value: note.id})
            })
            inquirer.prompt([
                {
                    type: "list",
                    name: "note",
                    message: "Select a note: ",
                    choices: notes,
                },
            ]).then(async(answers) => {
                const {data: note, error} = await supabase.from("notes").select("*").eq("id", answers.note)
                if (error) {
                    console.log(chalk.redBright('⛔ ' + error.message));
                    exit(1)
                }
                else {
                    console.log(chalk.greenBright("✅ Your note:"))
                    const { data: image, error } = await supabase.storage.from('thumbnails').download(note[0].thumbnail)
                    if (error) {
                        console.log(chalk.redBright('⛔ ' + error.message));
                        exit(1)
                    }
                    if (image) {
                        const imageBuffer = Buffer.from(await image.arrayBuffer())
                        console.log(await terminalImage.buffer(imageBuffer, {width: "50%", height: "50%", preserveAspectRatio: true}))
                    }

                    const rainbow = chalkAnimation.rainbow(note[0].title);
                    setTimeout(() => {
                        rainbow.start();
                    }, 0);

                    setTimeout(() => {
                        rainbow.stop();
                        console.log(chalk.bold.cyanBright(note[0].note + "\n"))
                    }, 2000);
                }
            })
        }
    });
The output looks something like this:

Track code changes with Git 🖲️
When all the changes are done, make sure to stage and commit them. Follow these things while making commits:
write meaningful commit messages and follow conventional commit rules; instead of writing a message like "added a new feature called todos", write "feat: added todos".
make a commit for a particular change at a time; don't write a single commit message for many changes that don't make sense together because honestly, you won't be able to write a suitable message in that case.
for unsure changes, create a temporary branch
push changes to your remote repository regularly

Conclusion 💖
This was the gist of the project and I hope you got to learn something out of it! Making CLI tools is super easy and no matter what language you know you can create a CLI app of your own; whether in Python, Go, or anything else. Supabase is a cool alternative to Firebase and I feel you should give it a go...

Thanks for reading till the end :)